How to configure an Amazon RDS environment for MySQL
Although there are different tiers available to install the RDS MySQL Environment, we will just explore the free tier of the RDS service. You can spin up an instance as required if you need to. Depending upon the processors and time, the service charge for the databases may vary. Using the free-tier, users are eligible to use the RDS service for free up to 750 hours a month and I think that is enough for the service to run without incurring any additional charges.
1. Setting up the RDS environment
Configuring the RDS MySQL Environment by first signing up for an AWS Account. Once you have successfully created the AWS account, search for RDS in the Find Services bar and hit enter.
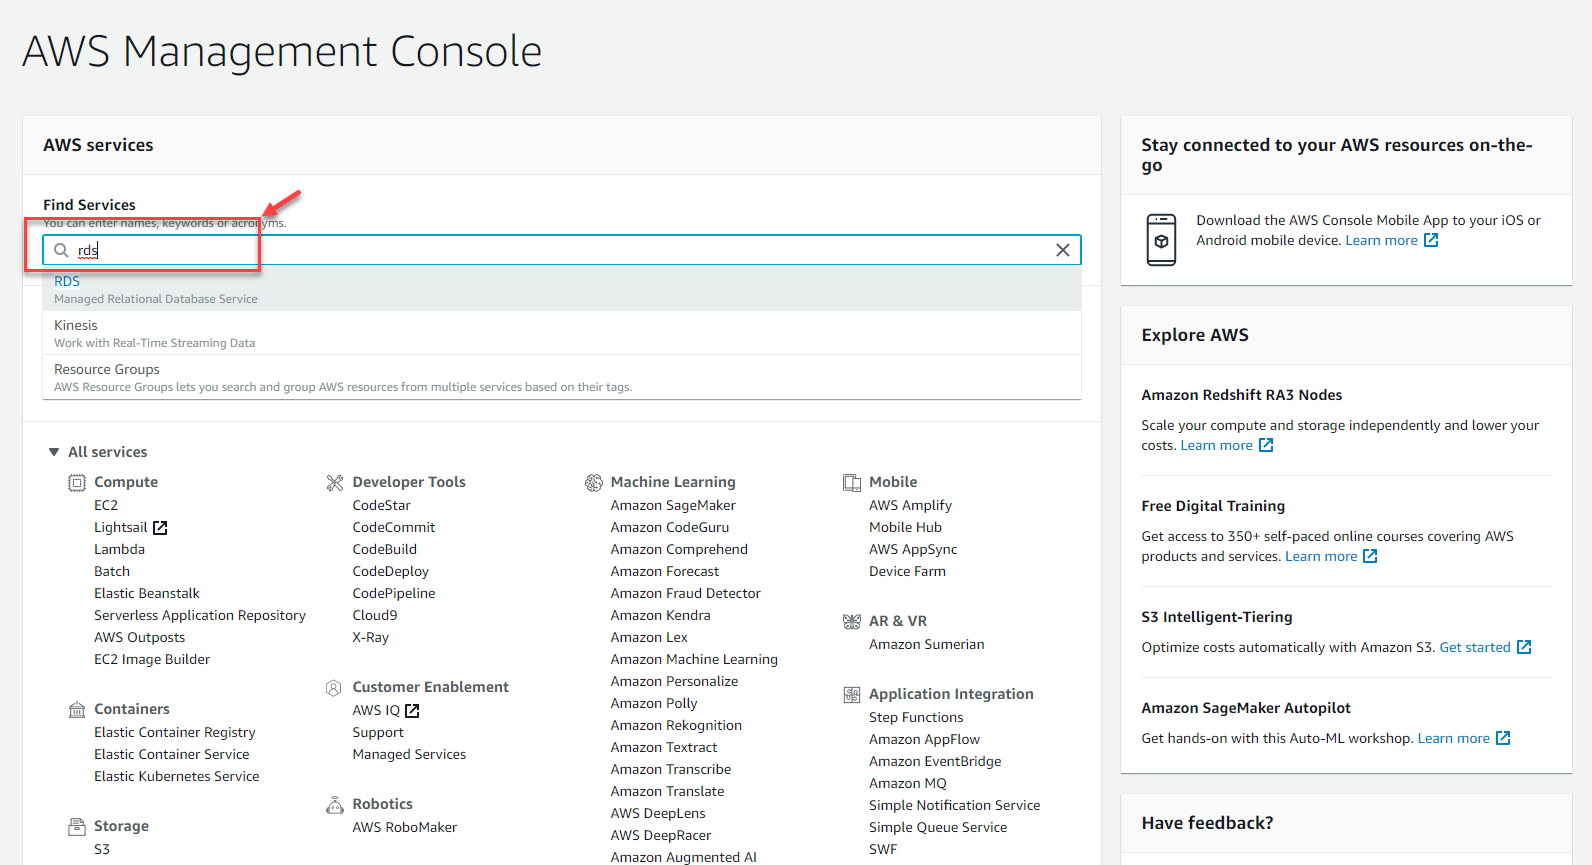
Figure 1 – Searching for AWS RDS
Open the RDS from the drop-down menu and proceed to create the RDS MySQL Environment. On the next page that appears, click on Create Database. This will open another page where you can define the necessary details required to set up the MySQL Database.
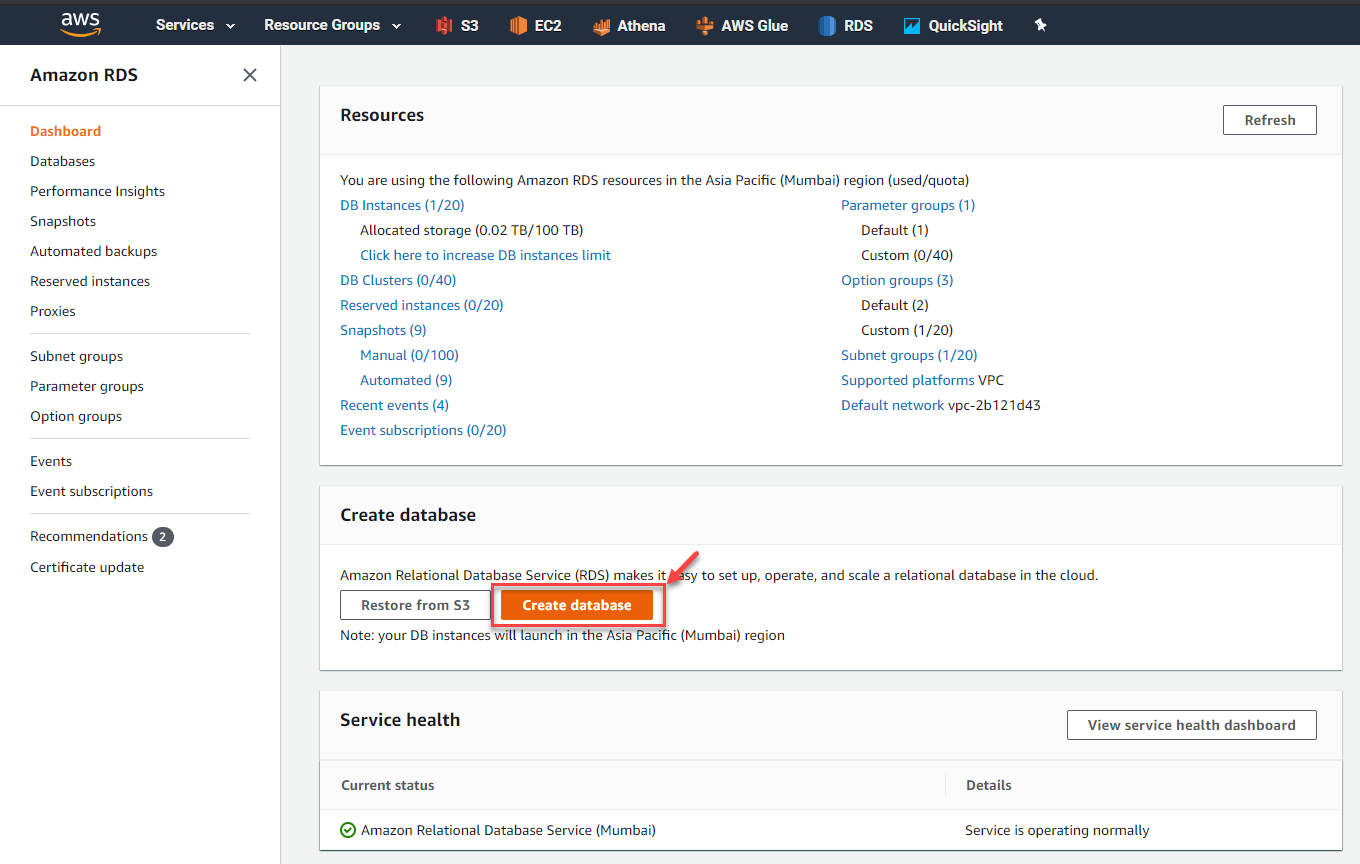
Figure 2 – Create Database Button in AWS RDS
2. Creating the MySQL database
Once you click on the Create Database, a new page opens as follows, where you can define the database creation method and other options. We are going to select Standard Create as the database creation method. This will allow us to configure all the necessary settings on our own. Next, select the Engine Type as MySQL and the latest version. At the time of writing this article, the latest MySQL version in 8.0.16.
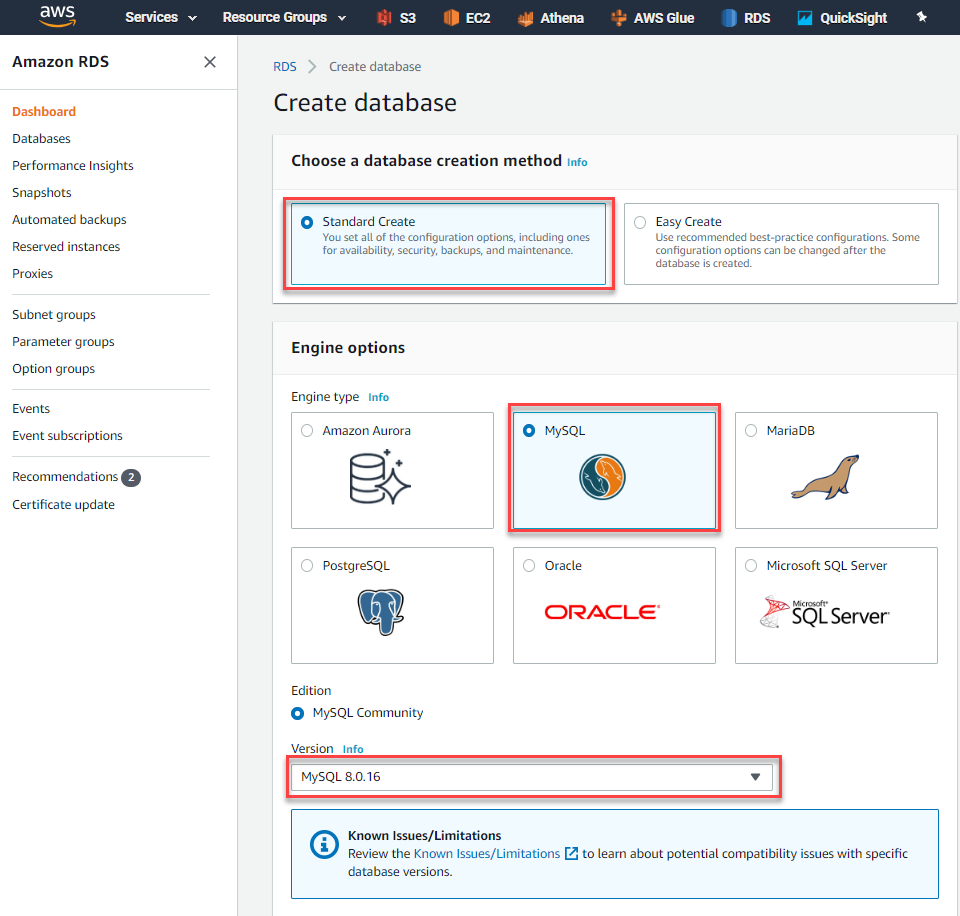
Figure 3 – Selecting the Database Engine
In the next step, we are going to provide the name and connection details for the MySQL Database that we are going to create. Since we are going to create the database in the free tier, select the Free Tier from the template and proceed. for example, I’m going to use the database instance as “mysql-db-test01”. Similarly, provide a suitable master username and password for the same. This is the username and the password, that you will be using later to connect to this MySQL instance later. Also, you must keep these credentials safe so that it can be used later again.
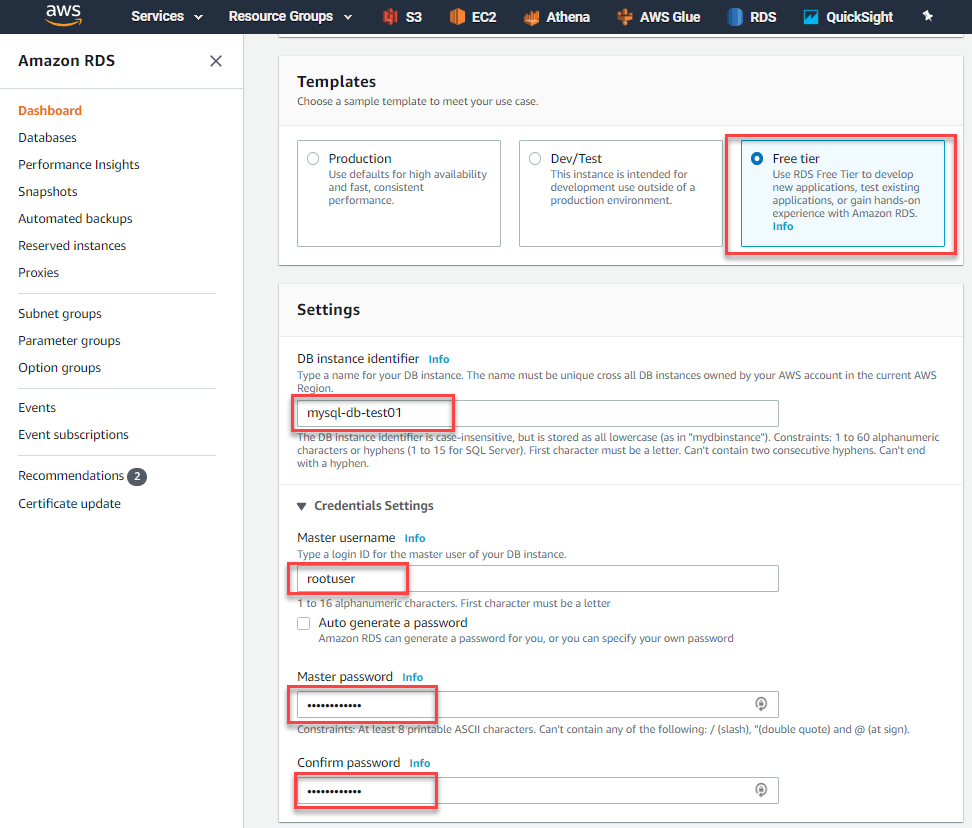
Figure 4 – Setting up the Instance Credentials
Now, that the instance credentials have been set up, let’s go ahead and set some other properties which are essential to set up the RDS MySQL Environment. Select the Database Instance Size as “db.t2.micro” and Storage Type as General Purpose SSD. By default, the memory size is allocated to 20GB which is fine for the moment.
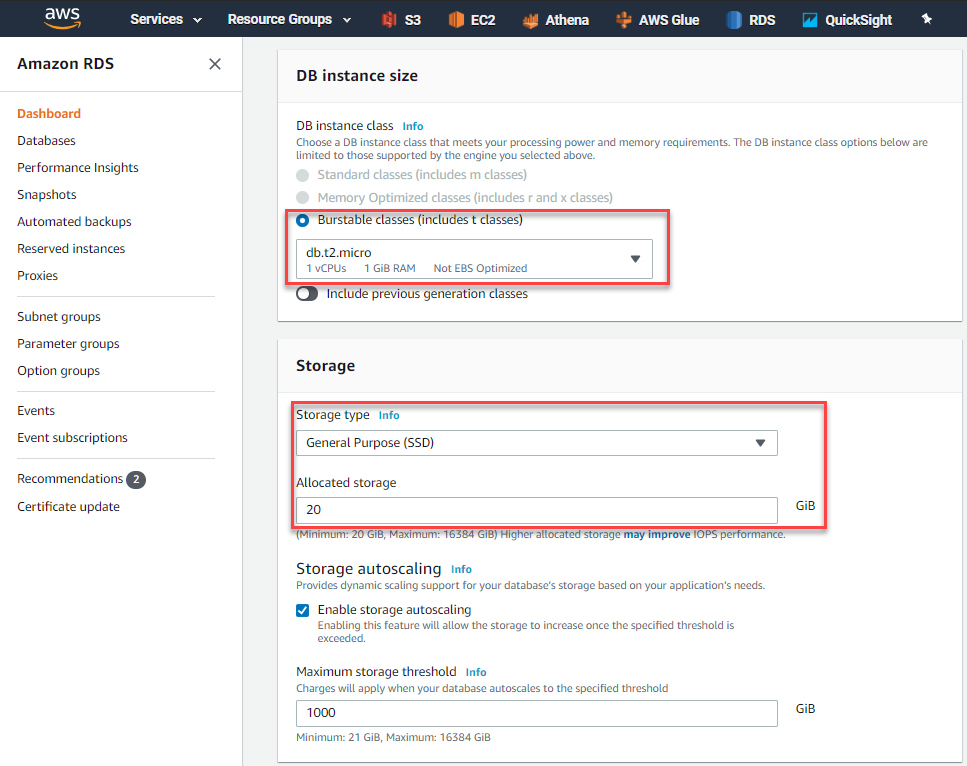
Figure 5 – Specifying the DB Instance Size
In the next step define the Connectivity settings for the RDS Database instance. Select the default VPC connection that is already available within your login. For my use case, I have already created some RDS instances previously, so I’ll be using the same VPC for this instance as well. Additionally, we should also add a Subnet Group within the VPC connection. Since we will be accessing the database instance from outside the AWS Environment, we should enable the Publicly Accessible to Yes. Finally, for VPC Security Group, select “Choose Existing” and proceed forward.
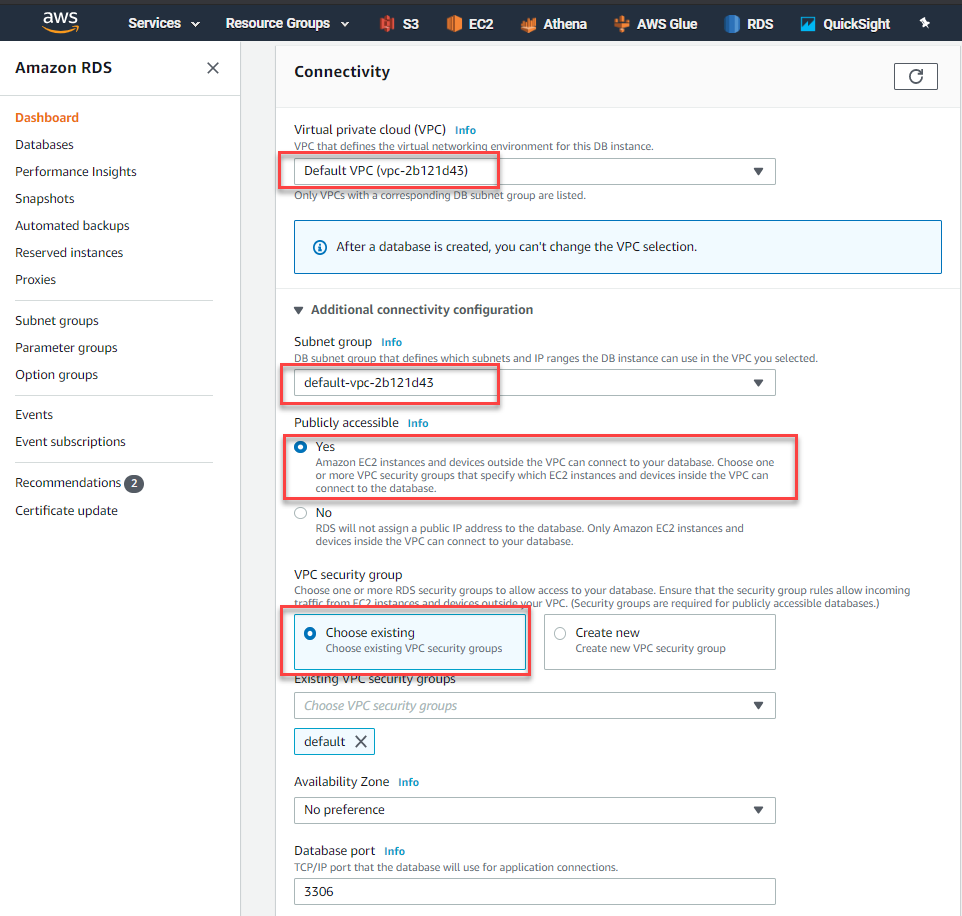
Figure 6 – Configuring Connectivity Settings for AWS RDS
Now that most of the configuration is done, in the final step we are creating the database Database Authentication Mode as Password Authentication. Once completed, click on Create Database.
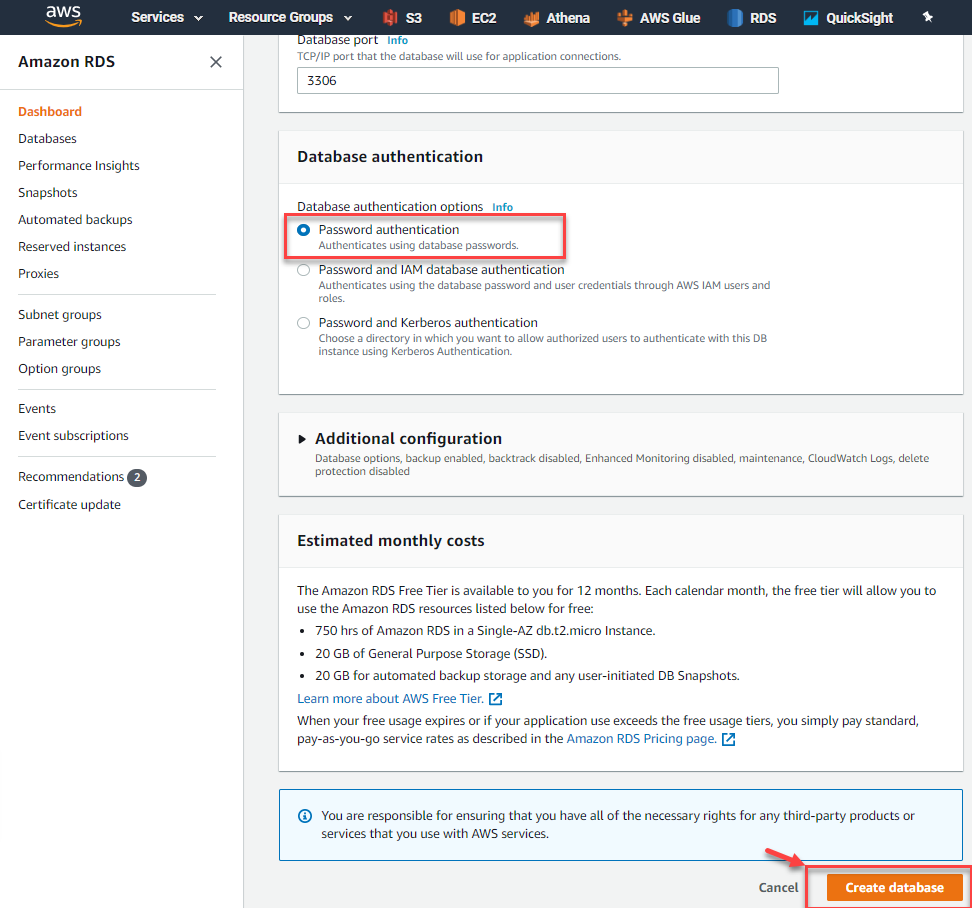
Figure 7 – Create Database in AWS RDS
3. Configuring the RDS MySQL Environment
Once you click on Create Database in the previous step, it might take a while for AWS to create the RDS instance and make it available for use. After a few moments, you will receive a notification that says the database has been created successfully.
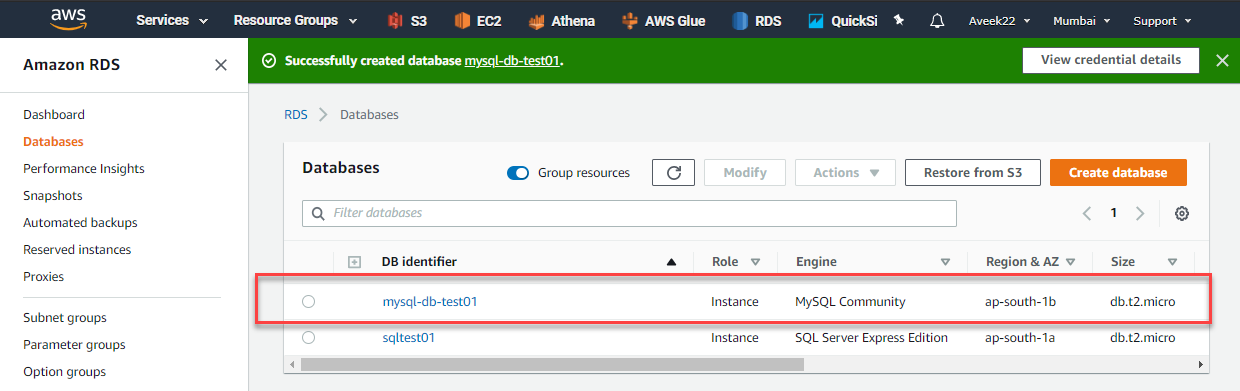
Figure 8 – RDS Instance for MySQL Created Successfully
As you can see in the figure above, I have already created an RDS instance for SQL Server previously, the newly added MySQL Community instance is also added to the Databases list. Go ahead and click on the DB Identifier for the MySQL Database. A new page will open containing more information about the MySQL database instance. The important thing in here is the Endpoint which is available. This endpoint information will be used later to connect to the instance using the MySQL Workbench tool.
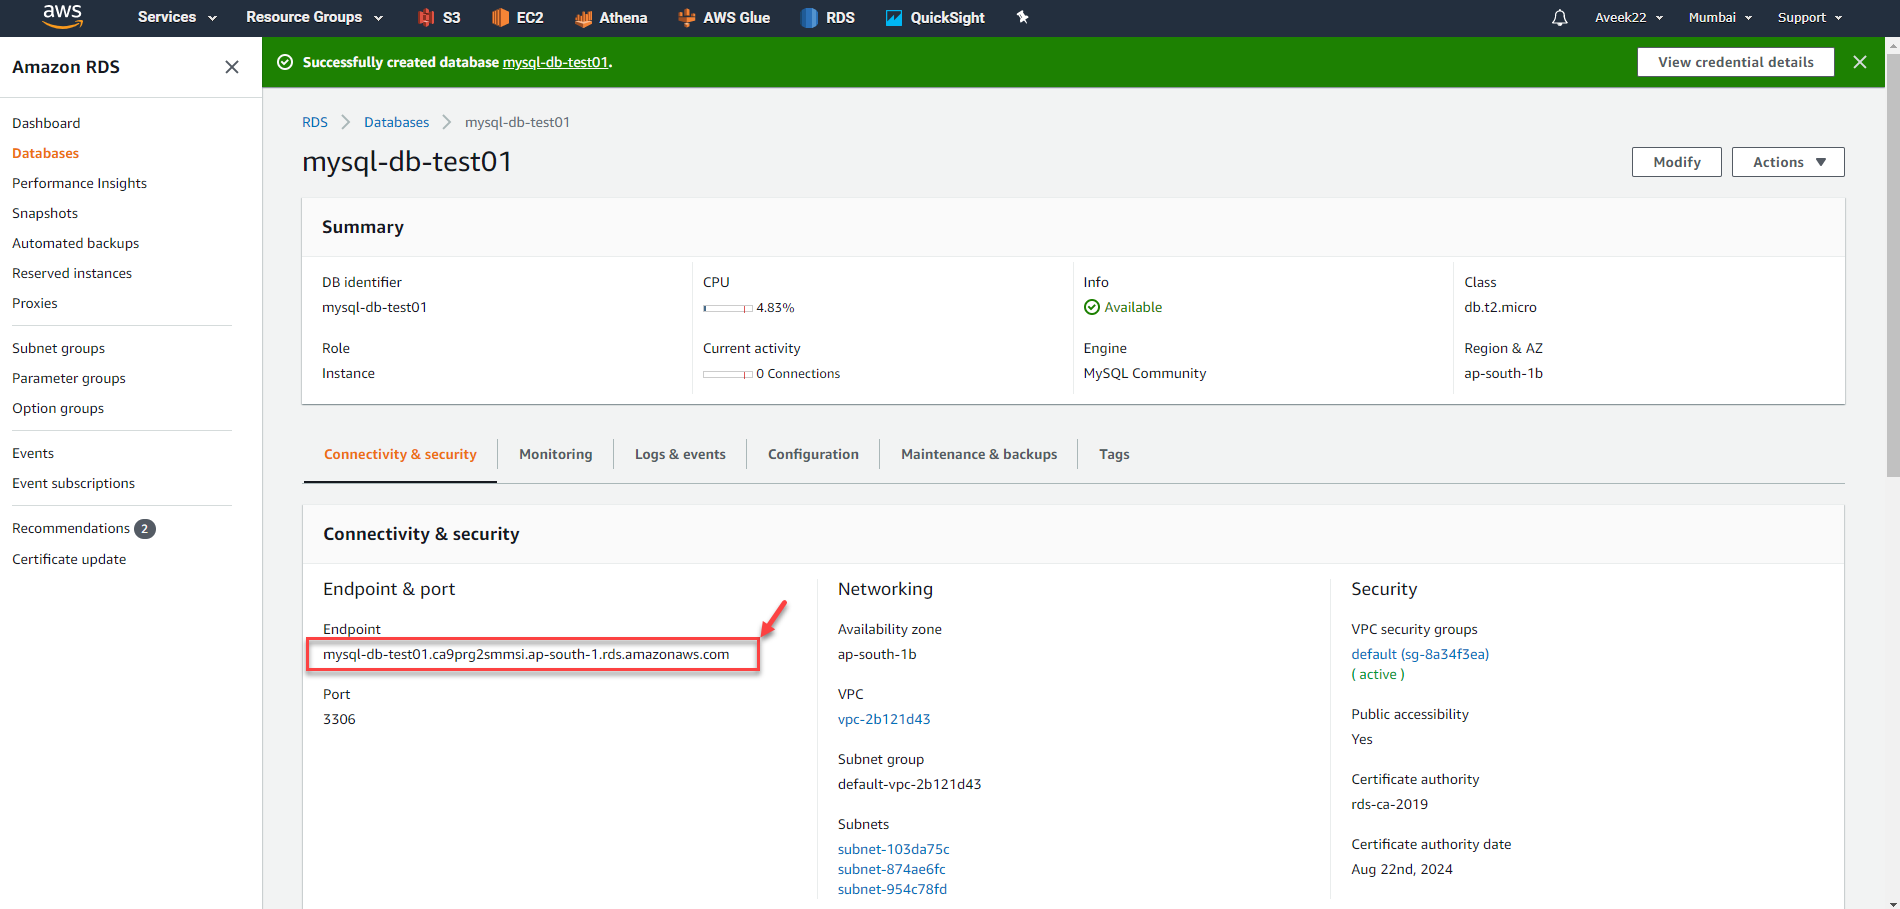
Figure 9 – MySQL Database Instance
The next step here is to allow connections from the public network to allow and connect to the instance. In order to enable this, click on the VPC Security Groups and then open the new page.
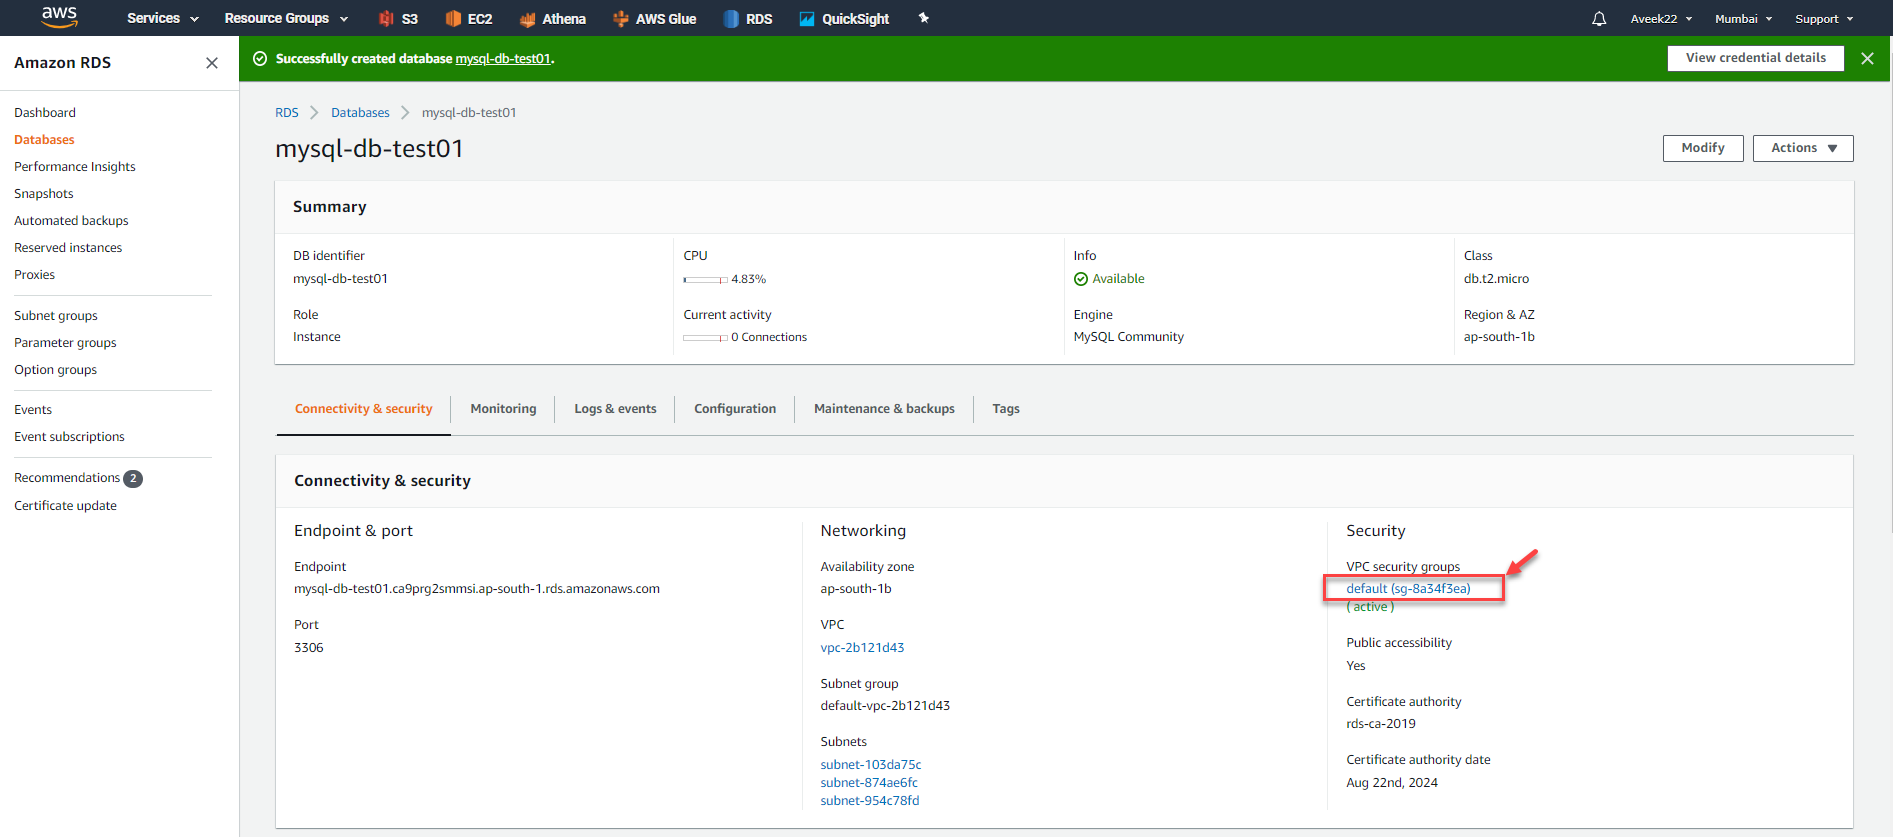
Figure 10 – VPC Security Groups
In the following page that appears, select the Security Group ID and open it.

Figure 11 – Security Group ID
In the Security Group page, select the Edit Inbound Rules button. This will allow us to edit the IP addresses that will have access to the MySQL Database instance.
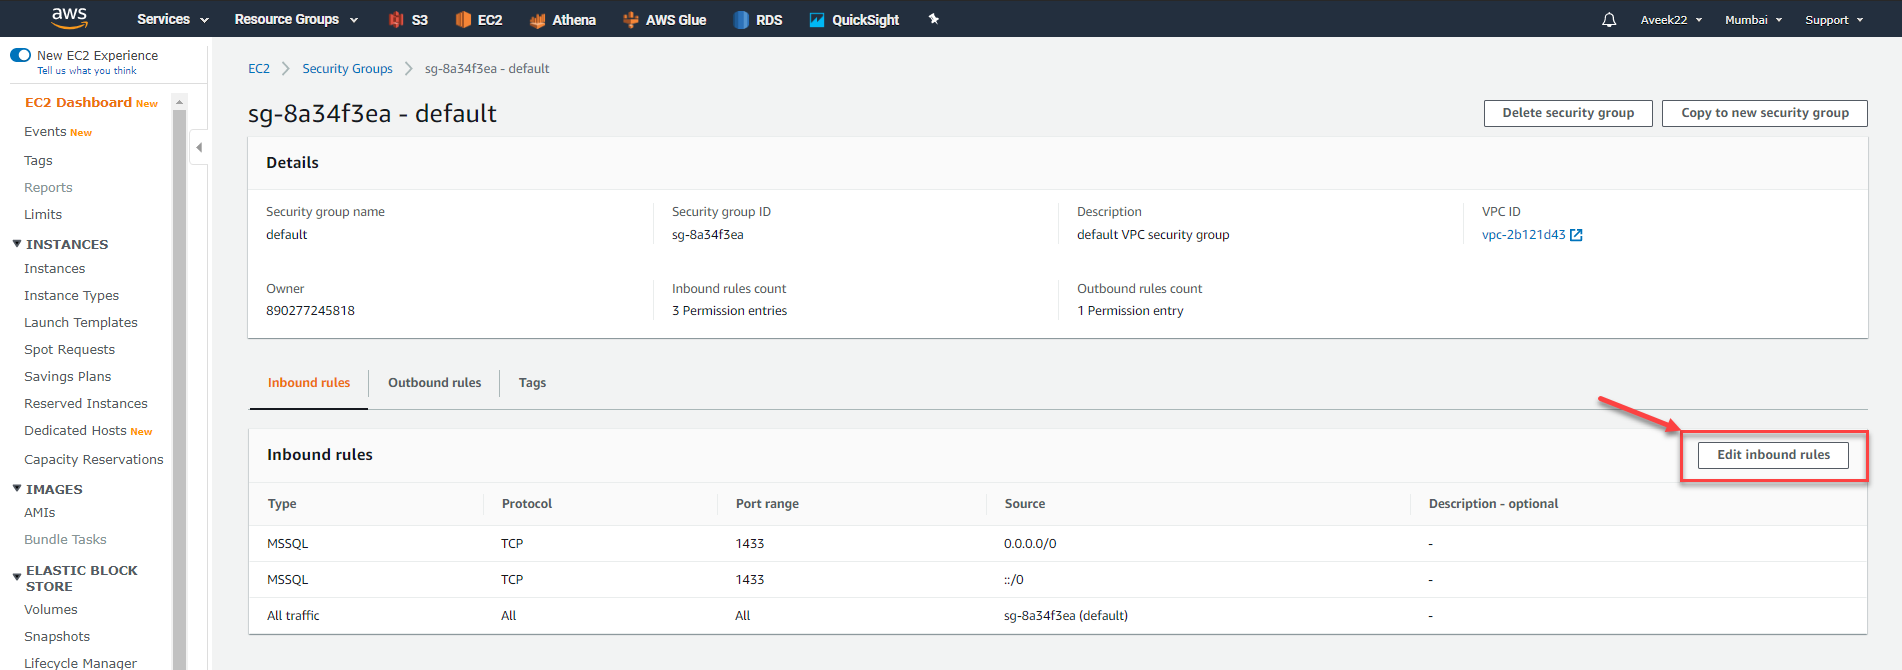
Figure 12 – Select Edit Inbound Rules
The Edit Inbound Rule page appears. On this page, we will add a custom rule which allows any IP address to connect to the RDS Instance on the port 3306. The port 3306 is the default port of MySQL is usually configured. If you are using any other port, you should allow traffic to that particular port instead.
Click on the Add Rule button and select the Source as Anywhere. This will allow all traffic from outside the AWS environment to connect to the MySQL instance on the RDS. Click on Save Rules once done.
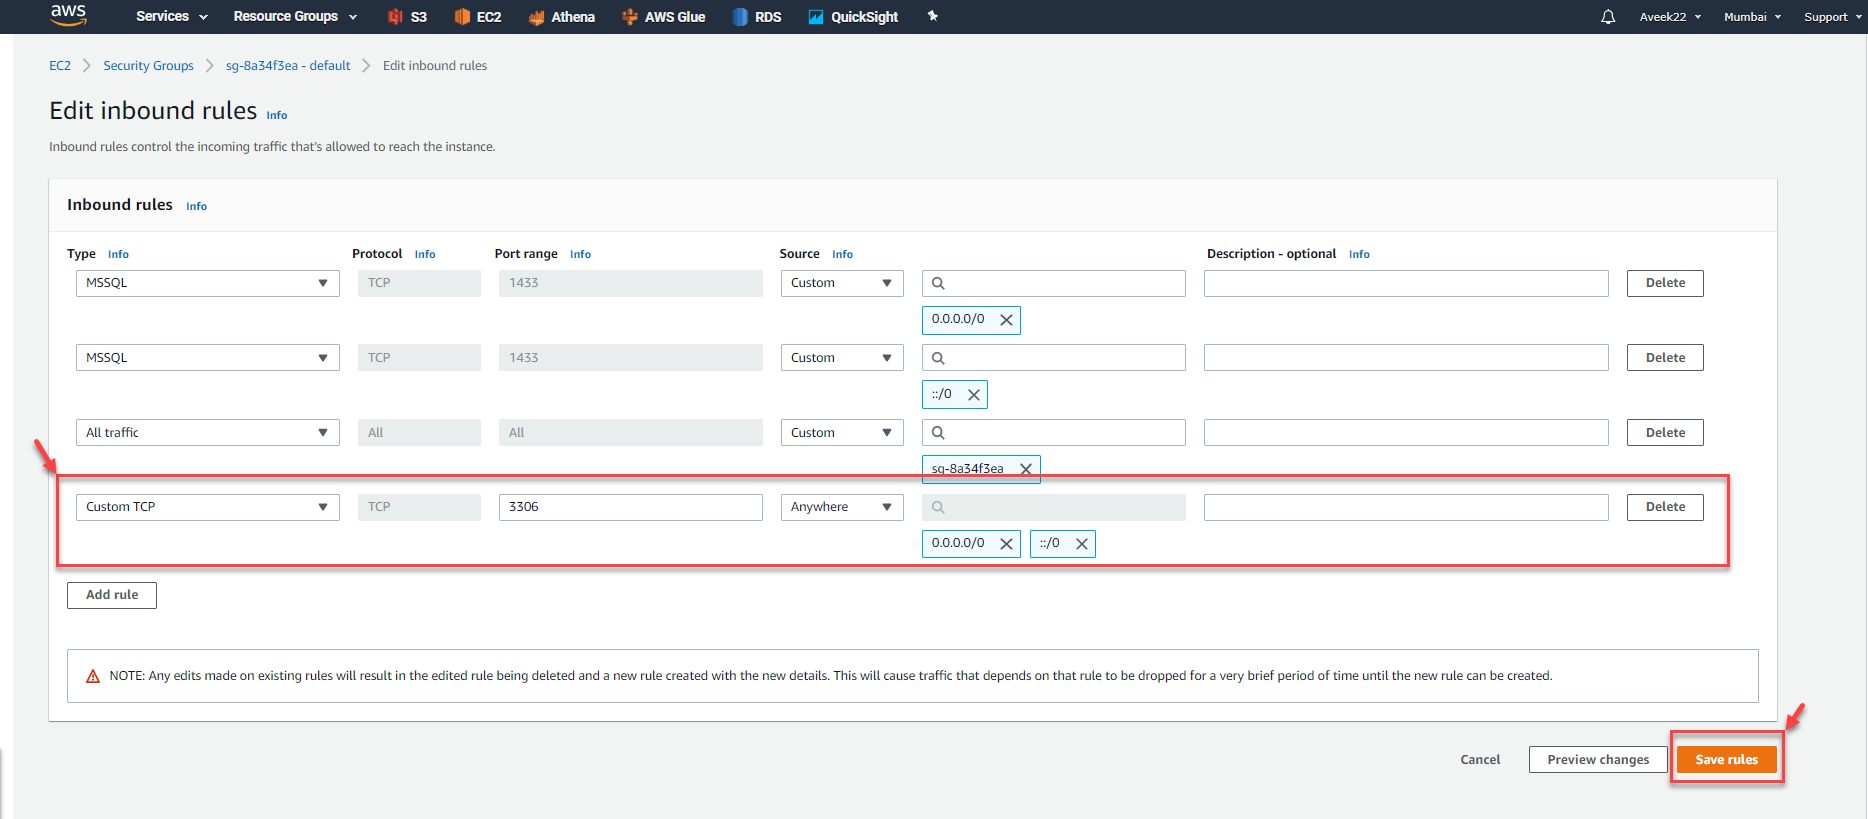
Figure 13 – Allow Inbound Connections
You can see that the new rules have been added to the list and are now effective.
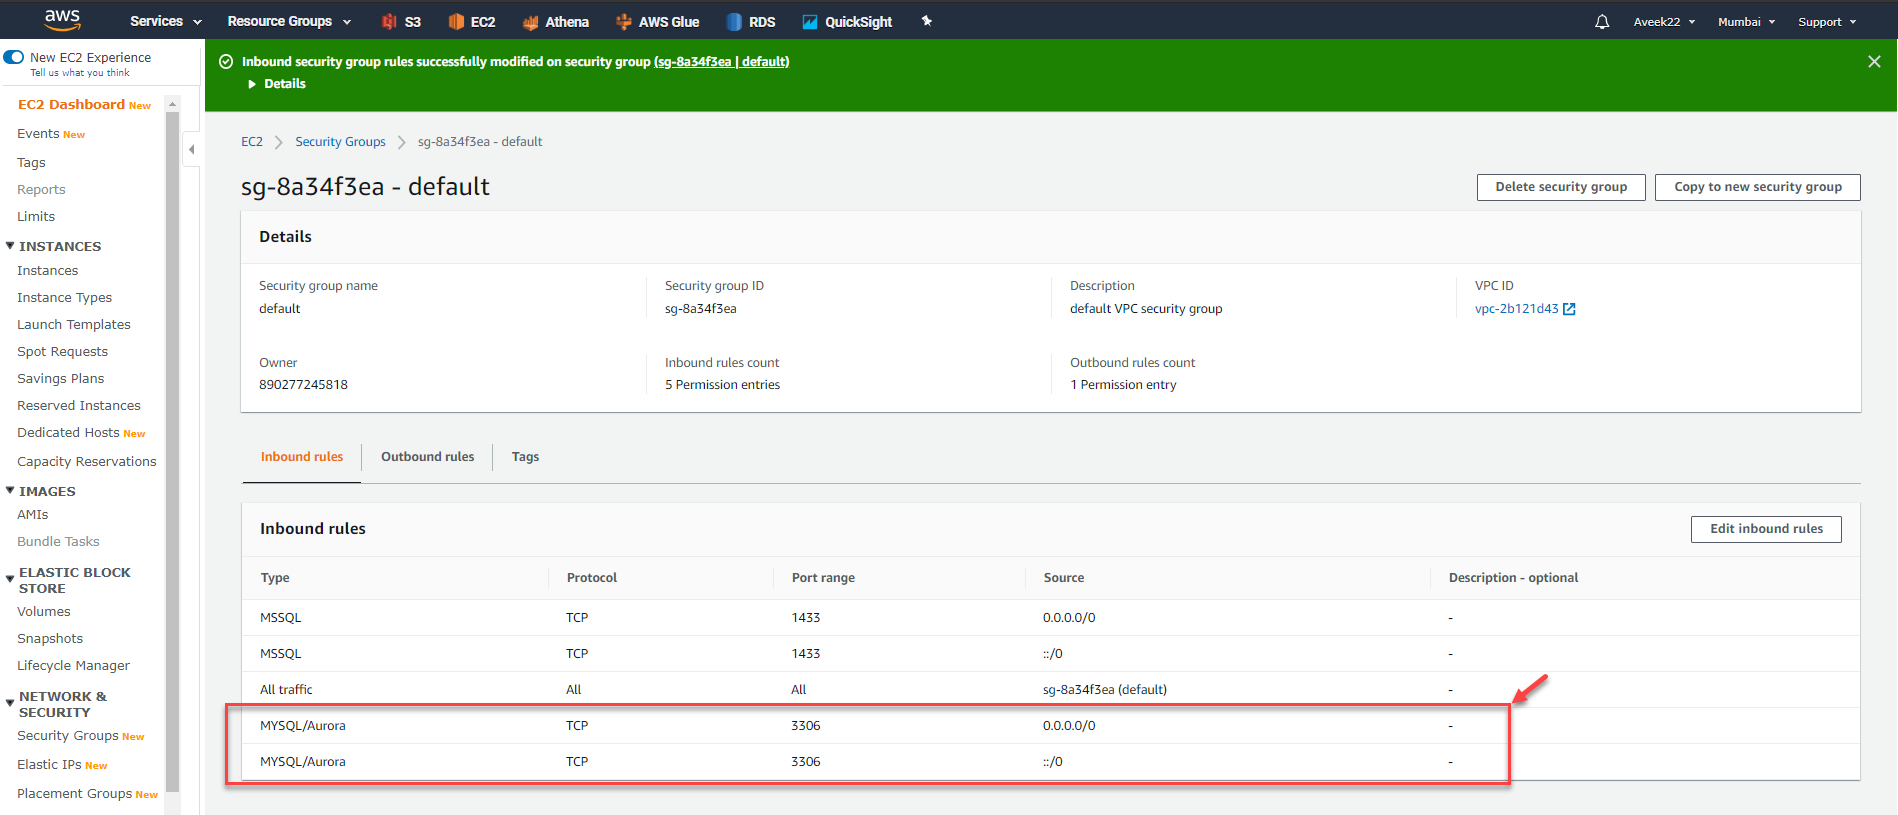
Figure 14 – Added Inbound Rules for MySQL
4. Connecting to the RDS environment using MySQL Workbench
We will be using MySQL Workbench to connect to the RDS instance. You can also choose any other tool to connect to the instance and it will work the same.
Enter the endpoint that we copied in the previous steps as the hostname and the master username as the username here and click on Test Connection.
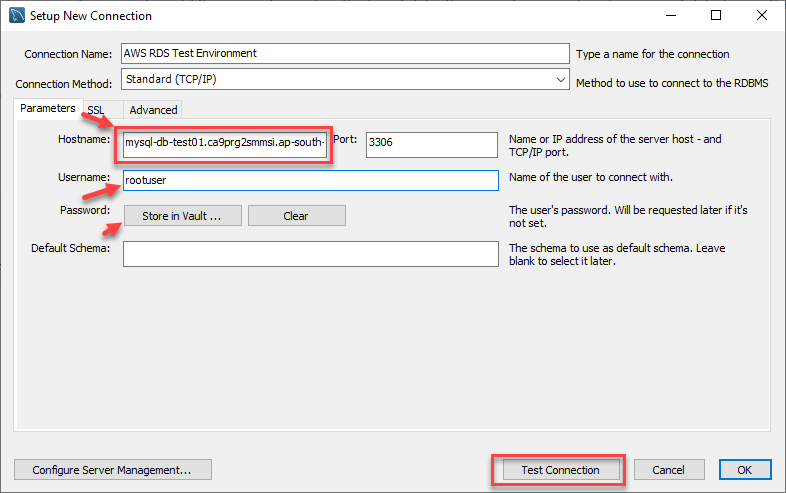
Figure 15 – Connecting to the RDS Instance
You might be prompted to provide the password in the next step.
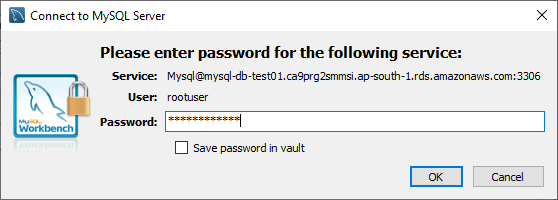
Figure 16 – Password to connect to RDS
If the connection is successful, you will receive a notification saying the connection has been successful.
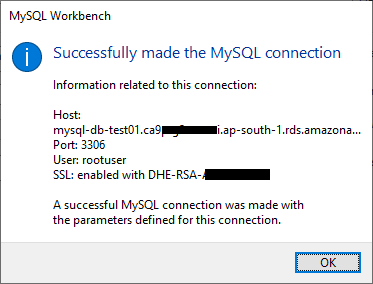
Figure 17 – MySQL Connection Successful
You can now go ahead and create your own schemas and tables in the RDS Instance.
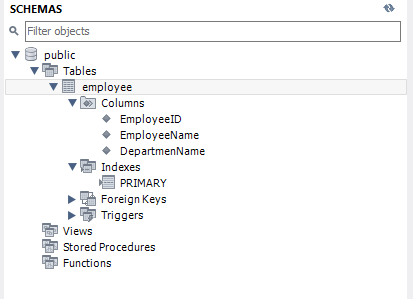
Figure 18 – Connected to RDS Instance
Conclusion
Amazon RDS is the relational database service offered by AWS using which it is very easy to start any RDBMS without worrying much about the infrastructure. In this article, we have seen how to configure the RDS MySQL Environment in AWS. We have also seen how to create the MySQL instance and how to allow remote connections to it from an external server. Finally, we have connected to the RDS MySQL Environment using the MySQL Workbench in local and executed simple queries.
No comments:
Post a Comment