Launch a static website using AWS S3 buckets
This article explores the
AWS S3 bucket to configure a static website.
Introduction
Amazon Web Services (AWS) has an object-level storage solution known as Simple Storage Service. We can store any kind of file in this cloud service. It gives you unlimited storage and a maximum of 5TB single file upload.
In the articles listed below, we explored S3 bucket integration with AWS RDS SQL Server using the web console, and AWS CLI commands.
- Integrating AWS S3 buckets with AWS RDS SQL Server
- Learn AWS CLI – Interact with AWS S3 Buckets using AWS CLI
We can use s3 buckets for hosting a static website. In many cases, we do not require a dynamic website where data changes very frequently. For example, suppose you publish technical articles on SQL Server. It is a static website as users open the website and read the content. We can leverage the s3 bucket for hosting a static website using AWS serverless architecture.
Let’s start configuring the static website using the AWS S3 bucket.
AWS S3 bucket configuration
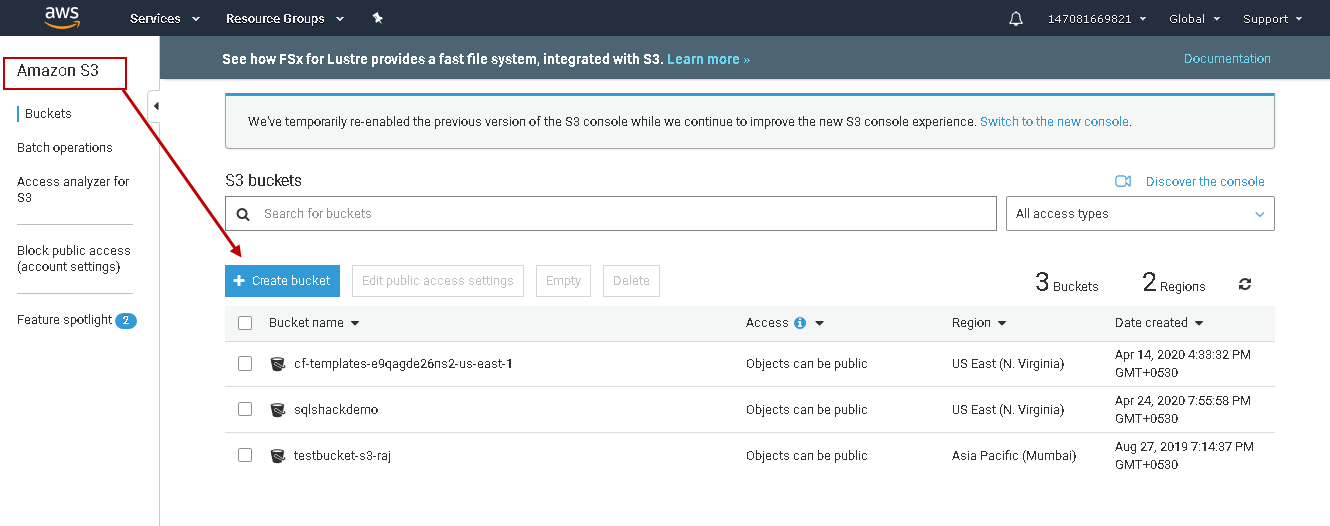
Logon to AWS web console and search for S3 service. It lists the existing buckets in your AWS account if any.
Click on Create Bucket to configure a new s3 bucket that holds contents for our static website. Give a unique bucket name and choose the appropriate region to deploy your AWS resources.

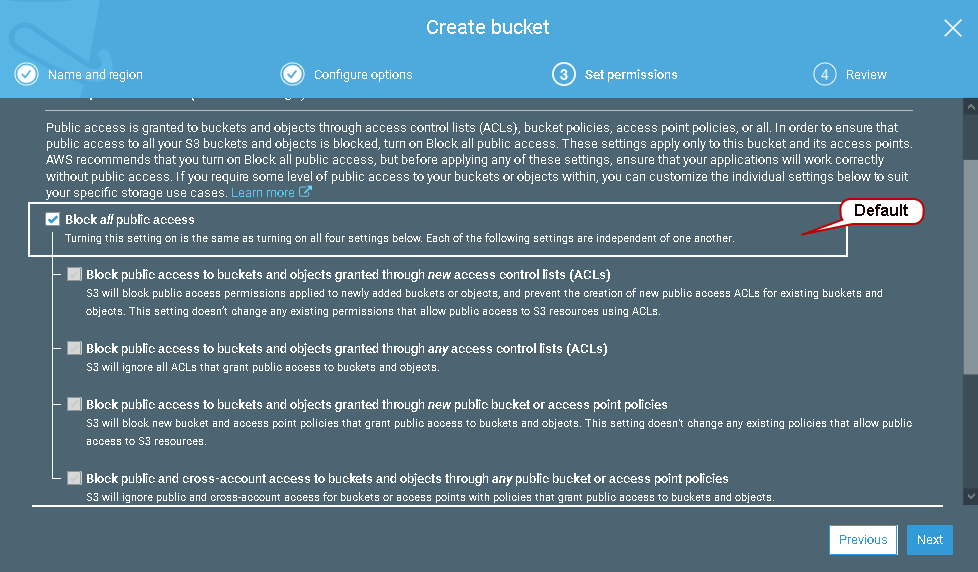
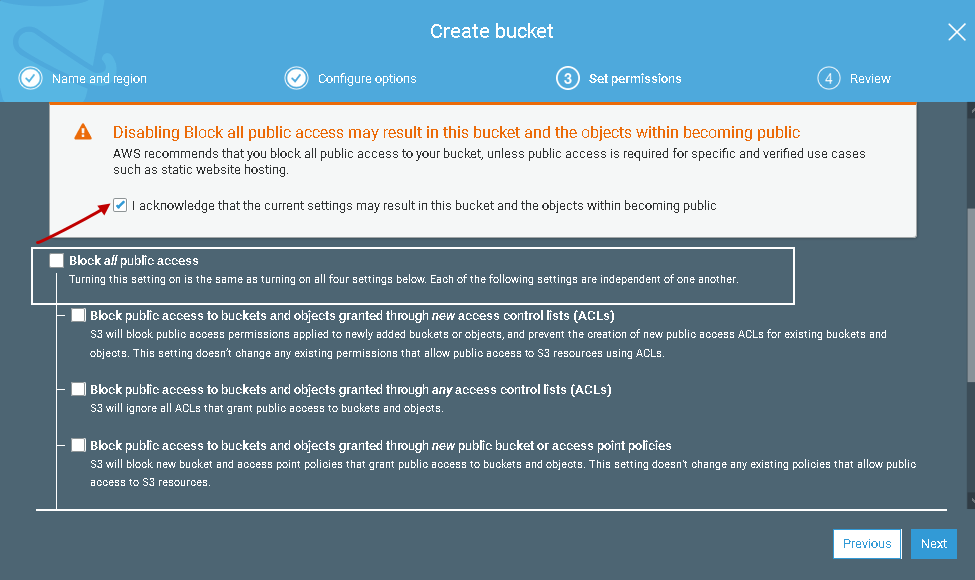
AWS does not allow public access for s3 bucket, by default. We need to edit this behavior for a static website. Click Next, and you see default behavior – Block all public access.
Remove the tick from the block all public access. It also gives you a warning message, and you need to acknowledge that you operated intentionally.
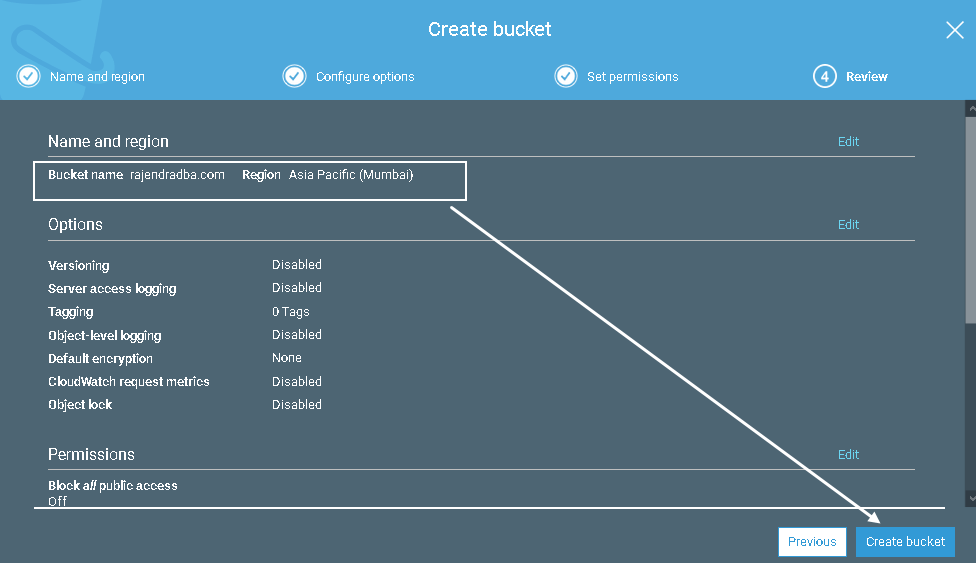
Review the bucket configuration and click on Create bucket.
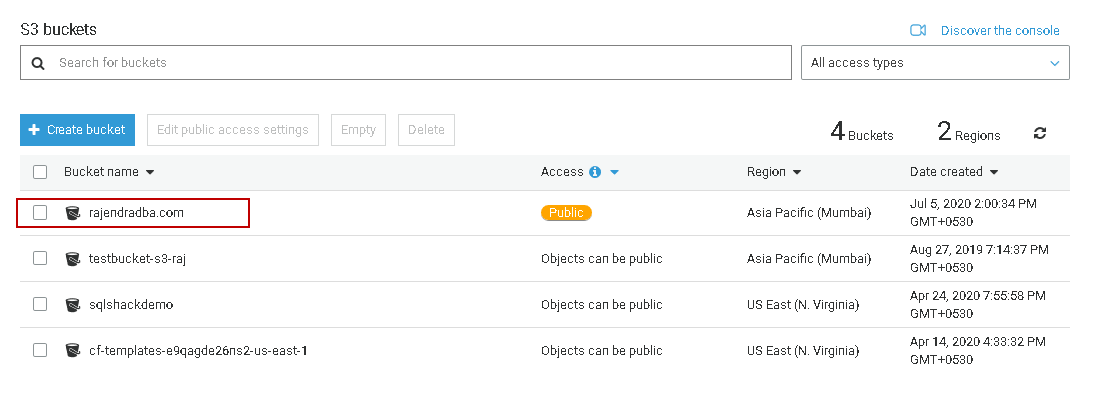
You can see the newly configured S3 bucket in the below screenshot.
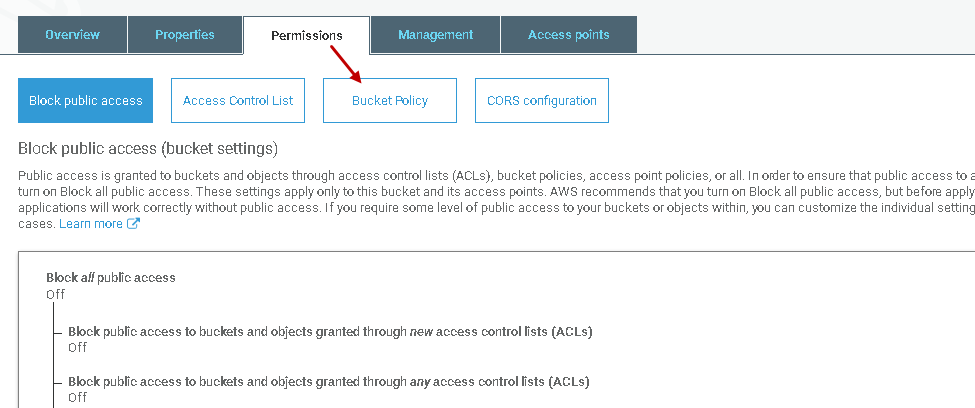
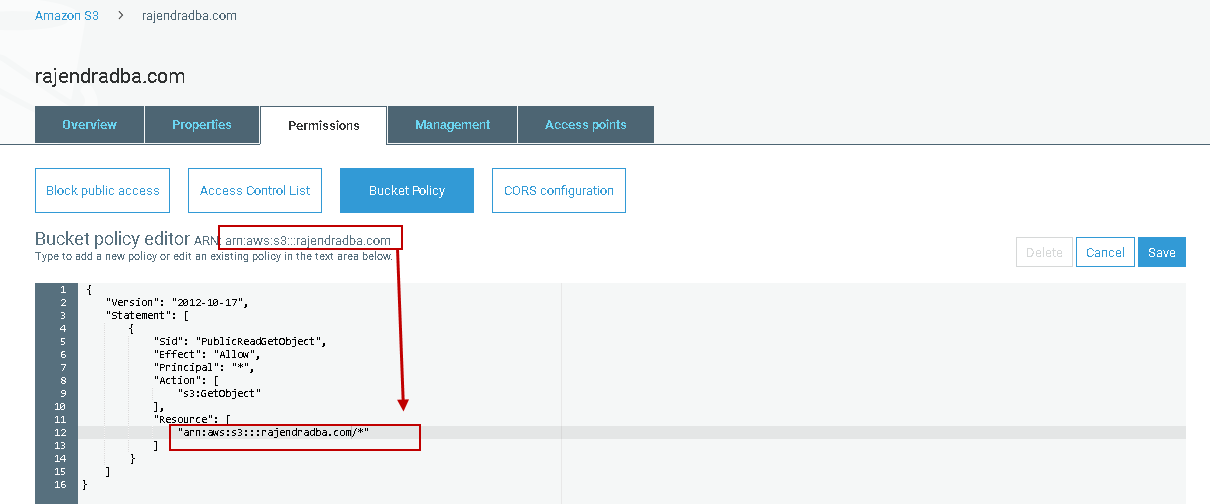
Now, open the bucket and go to Permissions -> Bucket Policy.
It opens the bucket policy editor. We can specify the policy in the JSON format. Paste the following JSON code with your bucket name.
1 2 3 4 5 6 7 8 9 10 11 12 13 14 15 16 | { "Version": "2012-10-17", "Statement": [ { "Sid": "PublicReadGetObject", "Effect": "Allow", "Principal": "*", "Action": [ "s3:GetObject" ], "Resource": [ "arn:aws:s3:::example.com/*" ] } ] } |
Create a static website using HTML
You should create a static website in your local system and test if it is working correctly or not. For this article’s demo purpose, I create a basic HTML website.
It uses the following HTML files.
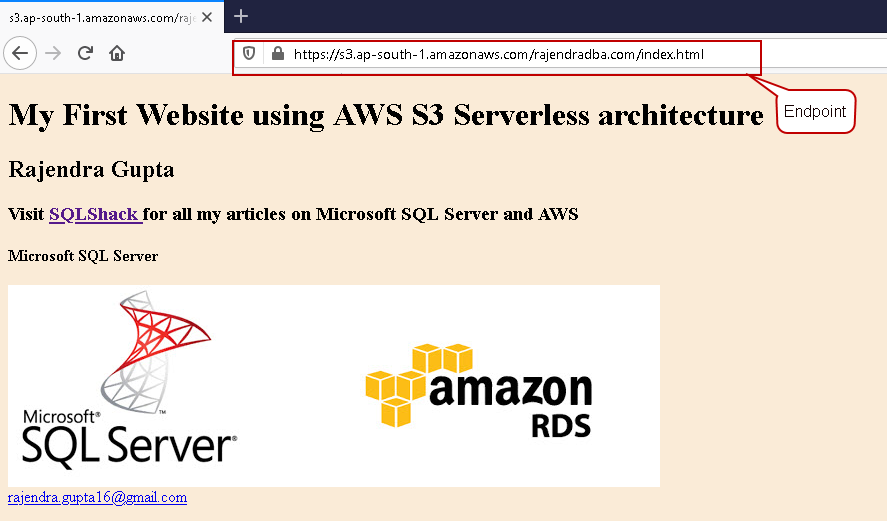
Index.html: This file contains the content of the static website
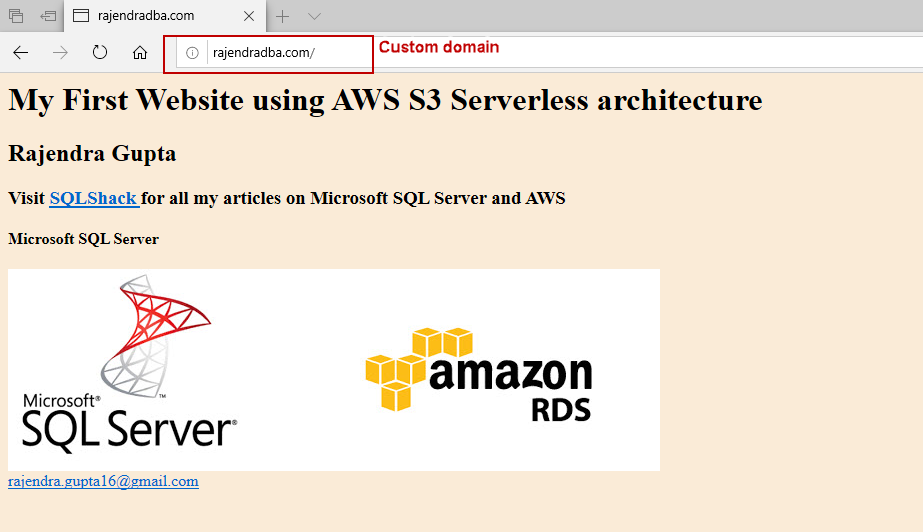
123456789<body style="background-color:#FAEBD7"></body><body><h1>My First Website using AWS S3 Serverless architecture</h1><h2>Rajendra Gupta</h2><h3> Visit <a href="https://www.sqlshack.com/" target="_blank" rel="noopener noreferrer">SQLShack </a>for all my articles on Microsoft SQL Server and AWS</h3><h4>Microsoft SQL Server</h4><img src="image.jpg" ></br><a href = "mailto: rajendra.gupta16@gmail.com">rajendra.gupta16@gmail.com</a></body>Error.html: It is a custom error HTML page. In case of any error, by default, you receive an error such as HTTP 404 Not Found. You can configure an error web page instead of this default page. I use the following HTML code for error documents
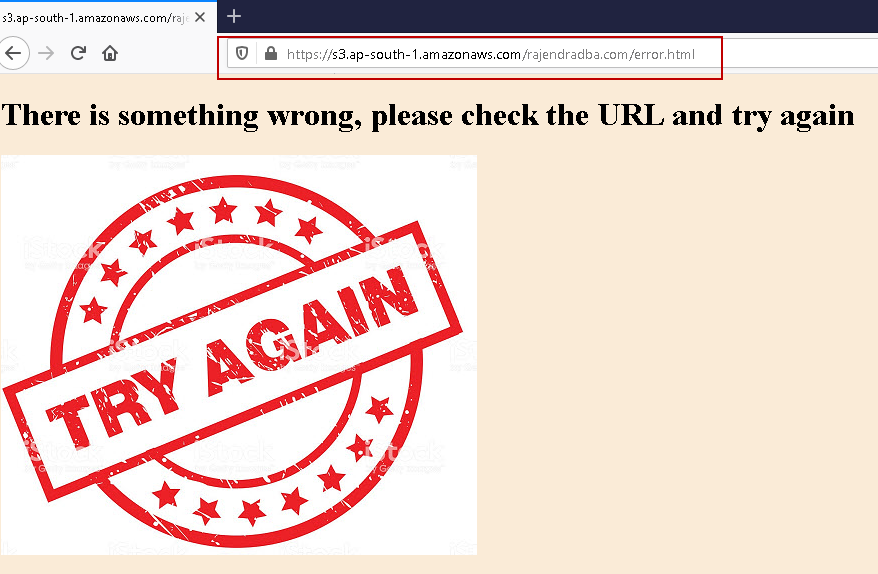
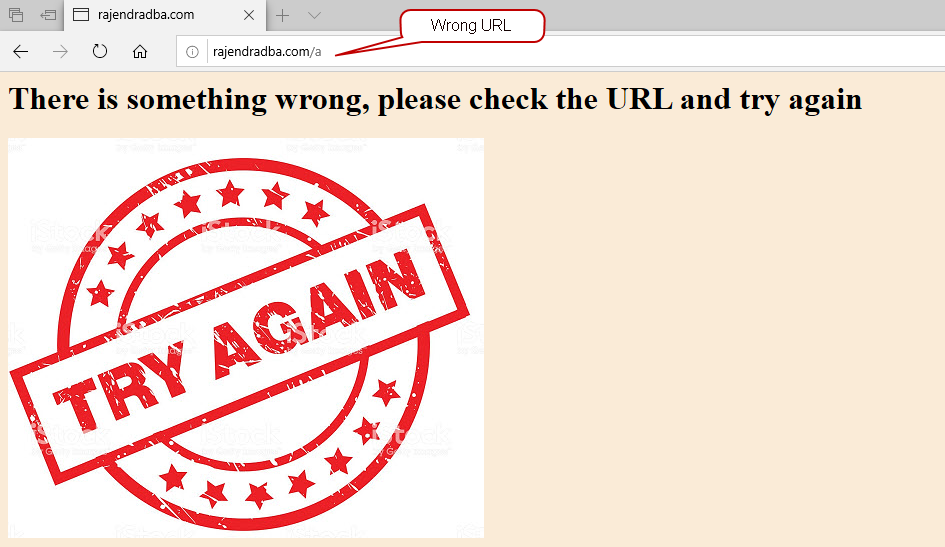
12345<body style="background-color:#FAEBD7"></body><body><h1>There is something wrong, please check the URL and try again</h1><img src="error.jpg" ></br></body>
Upload static website files to an AWS S3 bucket
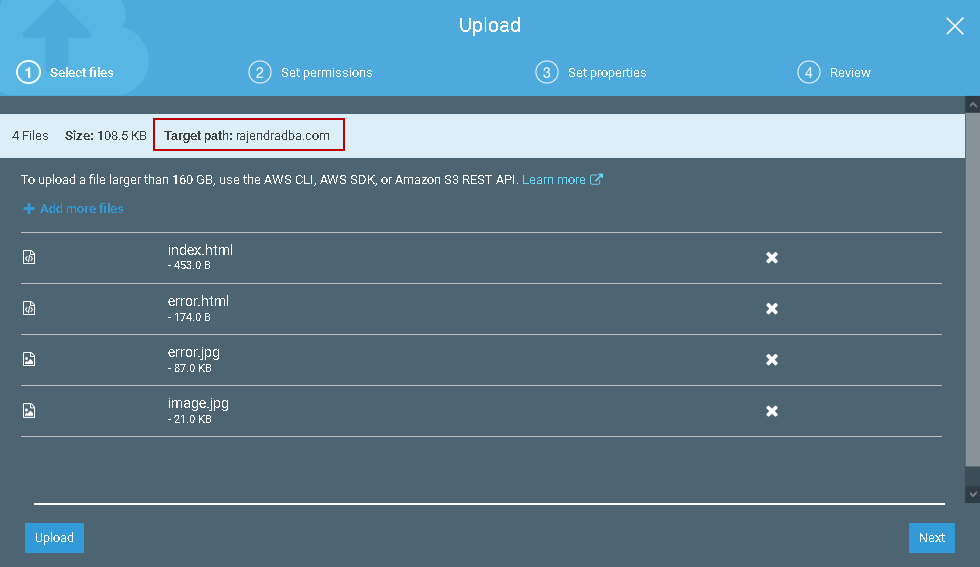
I have the following files for my static website:

Browse to the S3 bucket and upload all files in the bucket we created earlier.
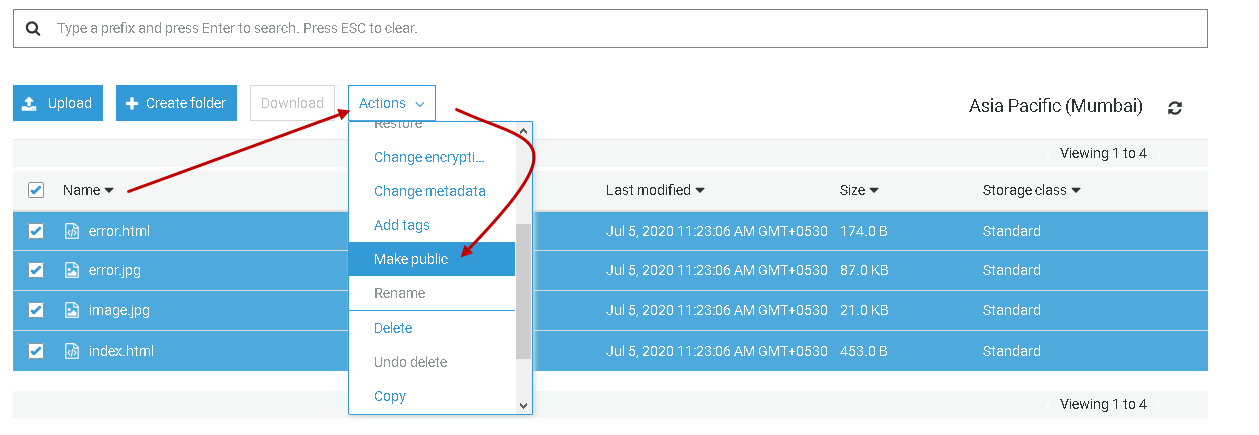
After uploading these files, select all files and go to actions-> Make public.
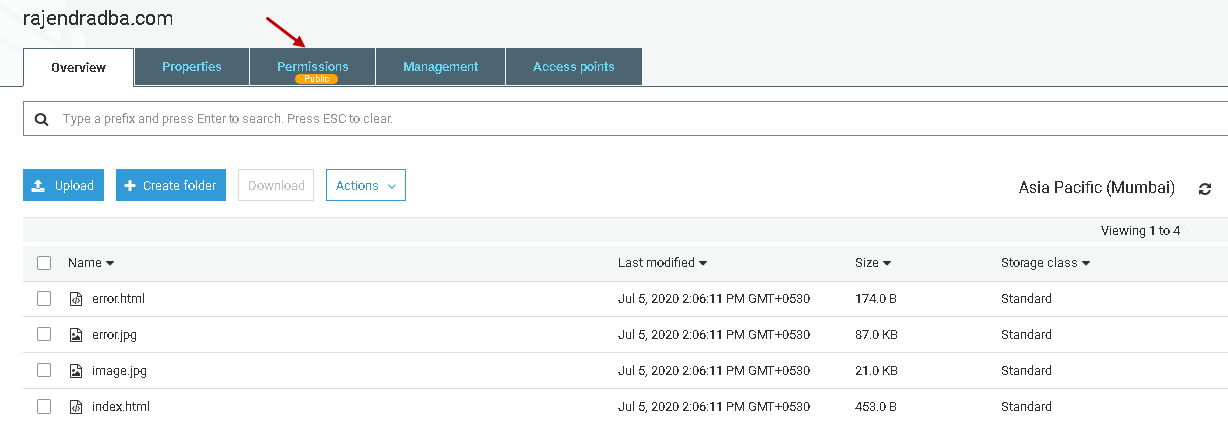
It highlights the public access to this bucket resources explicitly, as shown below.
Configure static website hosting in the AWS S3 bucket
We need to configure the S3 bucket for hosting a static website. Open the bucket and navigate to properties. Here, you get bucket configurations such as versioning, server access logging and static website hosting.
By default, static website hosting is disabled. Click on the box and do the following configurations.
- Select option – Use this bucket to host a website
- Specify the index document name. In my case, it is index.html
- Specify the error document name. In my case, it is error.html
These index.html and error.html should be available in the s3 bucket with public access.
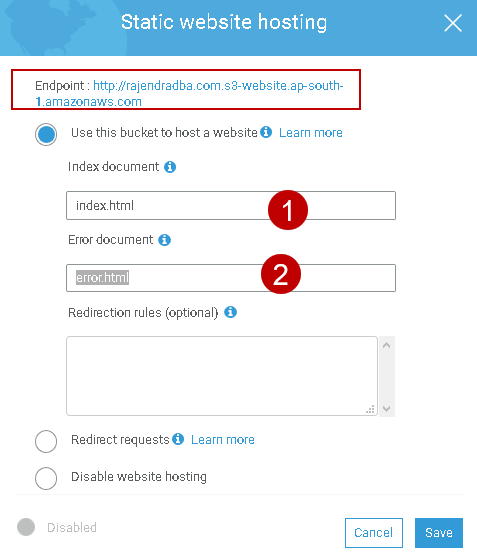
You should note-down the Amazon S3 website endpoint specified in the static website hosting page. Click on Save, and you see a tick mark in the bucket hosting property in static website hosting.
Now, open the endpoint URL in a web browser, and you should be able to launch your serverless static website using an S3 bucket.
Similarly, you can view the error HTML page in the web browser.
Accessing AWS Static Website with your domain Name
In the above steps, we accessed a static website using the endpoint. Usually, for a website, you require a user-friendly name like www.example.com
It is not convenient for users to remember the endpoint name. You might not get a good response for your website even it has relevant content. For this purpose, we can use the existing domain name or purchase a custom domain name. I do not have any domain names so let’s buy it from Amazon.
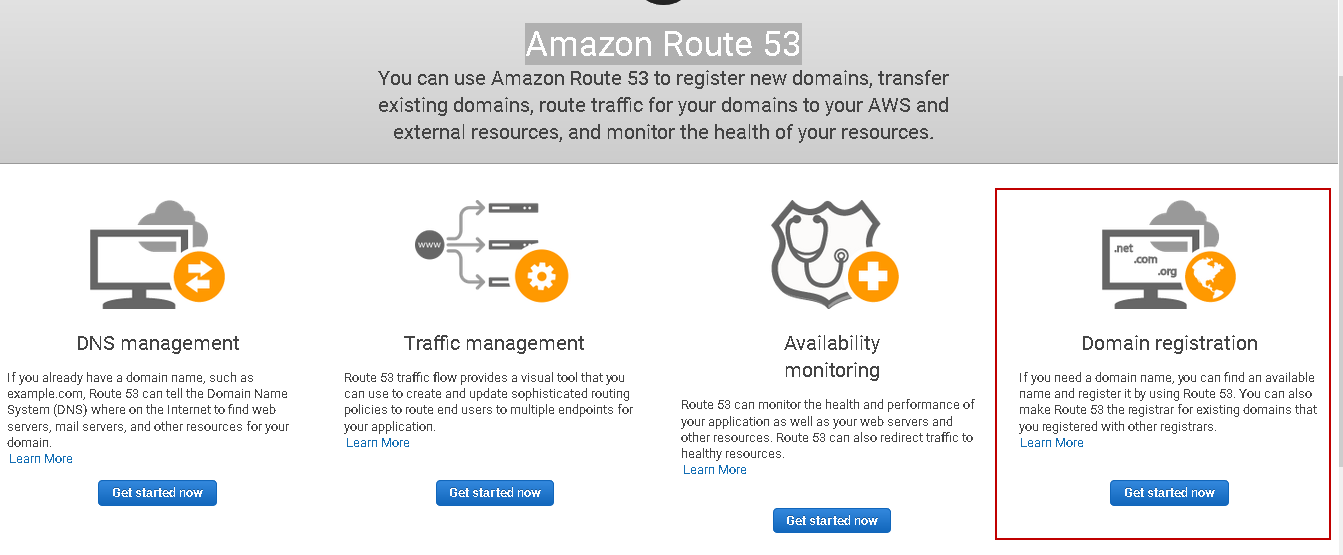
In the services, launch Amazon Route 53. It gives you the following options.
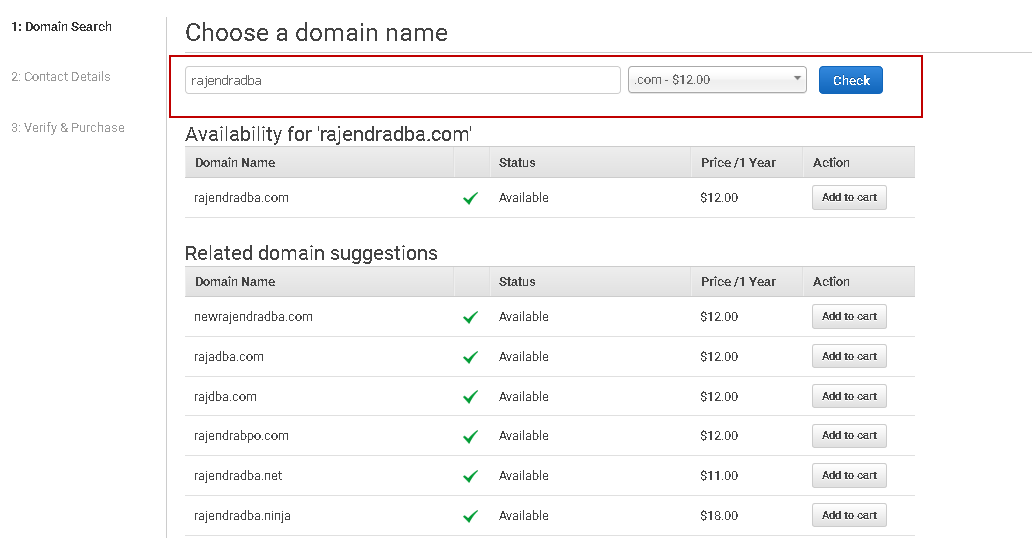
Click on the domain registration. Search for the domain name, and it shows you the price for different domains. Its price may vary in different domains. You can select the lowest price domain and click Next.
Enter your contact details such as first name, last name, address, contact number.
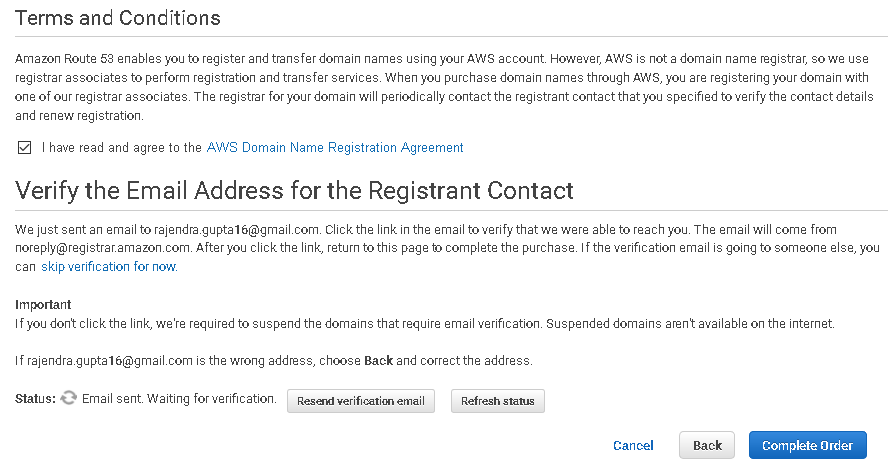
Click Continue. Verify details entered, accept terms & conditions and verify the email address of the registered contact.
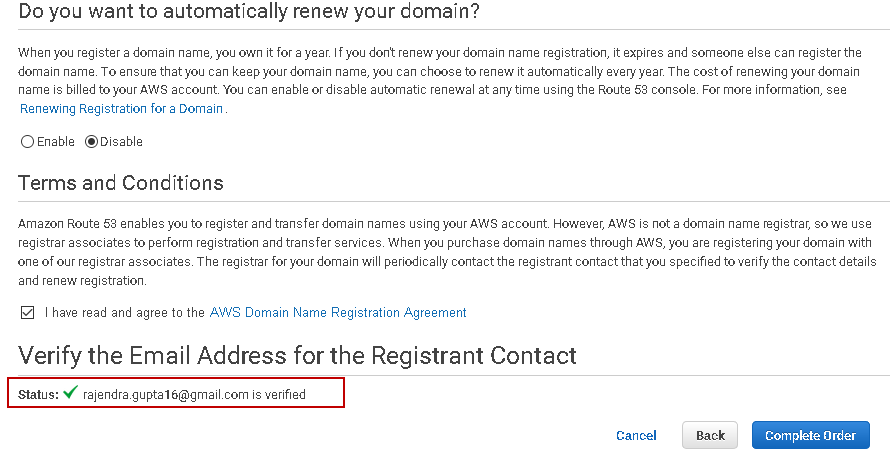
Check your registered email and click on the link received from Amazon Registrar. Once verification has competed, it shows verified status.
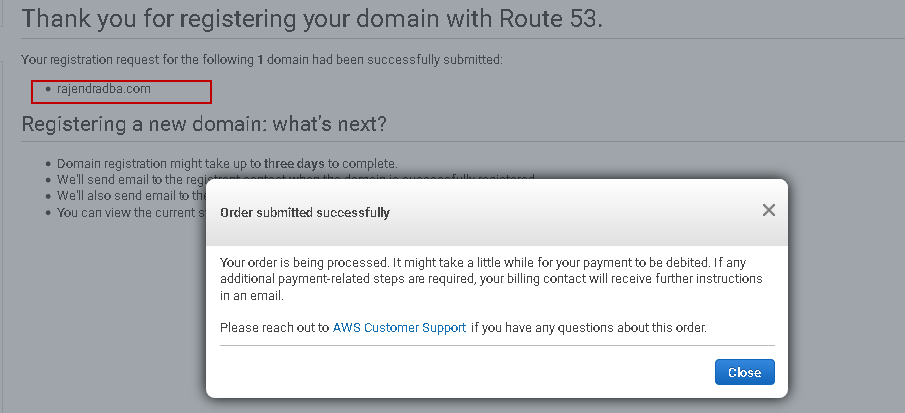
Click on complete order. It processes the order and debits the payment from your registered payment method in the AWS account.
It takes some time to register your customized domain. You can view your domains in the registered domain section of Route53.
Create DNS ‘A’ record for custom domain
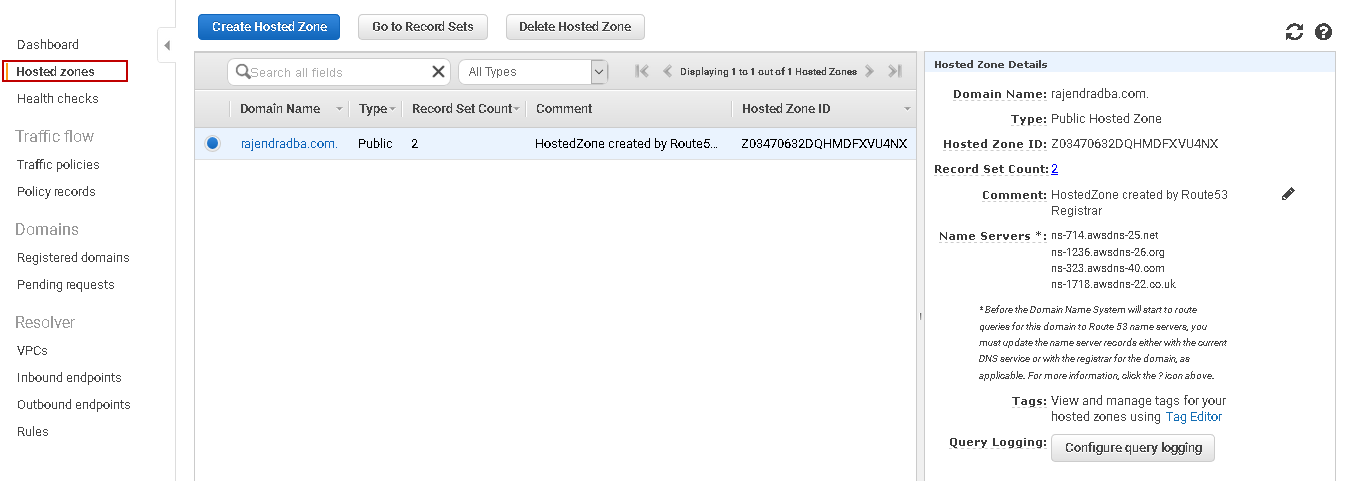
DNS ‘A’ record refers to an IP address of the specified domain. It holds an IPv4 address. Click on the hosted zones, and it shows your registered domain.
Click on the domain name, and it shows you pre-configured hosted zones. A hosted zone is like a container that has routing information for a domain. You can refer to Working with hosted zones for more details.
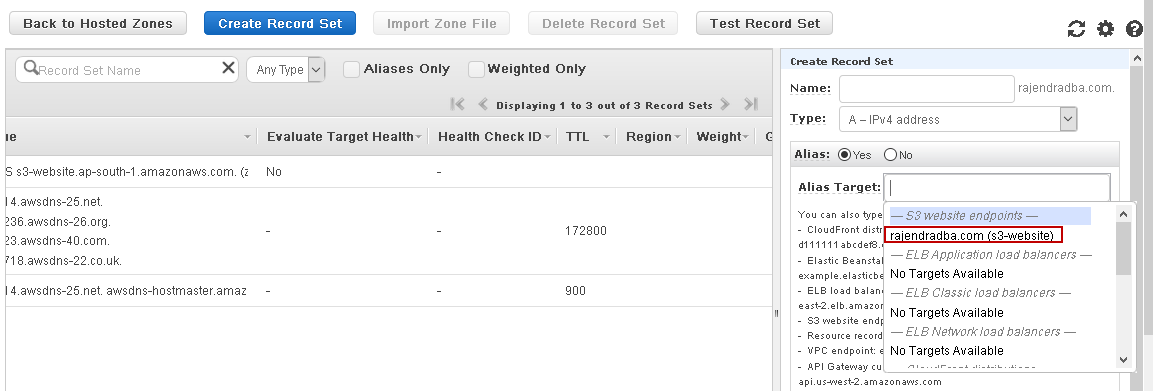
To create domain ‘A’ name, click on the Create record set. It opens a create recordset window.
Specify the following values:
- Name: It shows the name of the domain in the recordset name. We can go with the default value
- Type: Choose value A – IPv4 address from the drop-down list
- Alias: Choose Yes to create an alias
Alias Target: In the alias target, select the s3 bucket name. This bucket name should match with the custom domain. It lists the s3 bucket in the drop if it fulfills following conditions
- AWS S3 bucket should be configured as a static website
- The bucket name and the A record name should be the same
- Both the S3 bucket and A record should be in the same AWS account
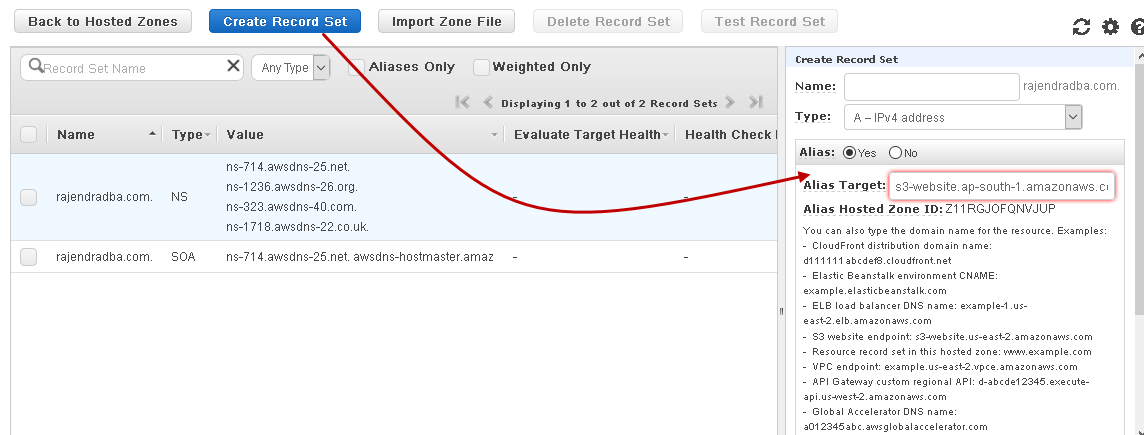
If you do not get the AWS S3 bucket name in the alias target, we can specify the Amazon S3 website endpoint for the region that consists of our S3 bucket for static website.
For my S3 bucket in the Asia Pacific (Mumbai) region, it has endpoint s3-website.ap-south-1.amazonaws.com. Once you specify the endpoint, it shows alias hosted zone ID. You can get the region-specific Amazon S3 website endpoint and hosed zone id from the AWS docs.
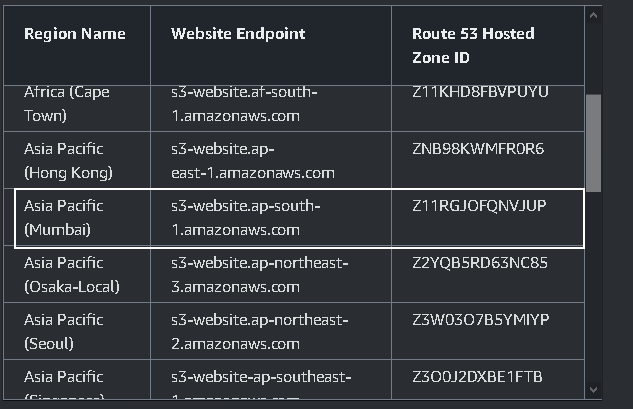
Specify the website endpoint, verify the hosted zone id and create the DNS ‘A’ record set.
It quickly creates the ‘A’ record, as shown below.
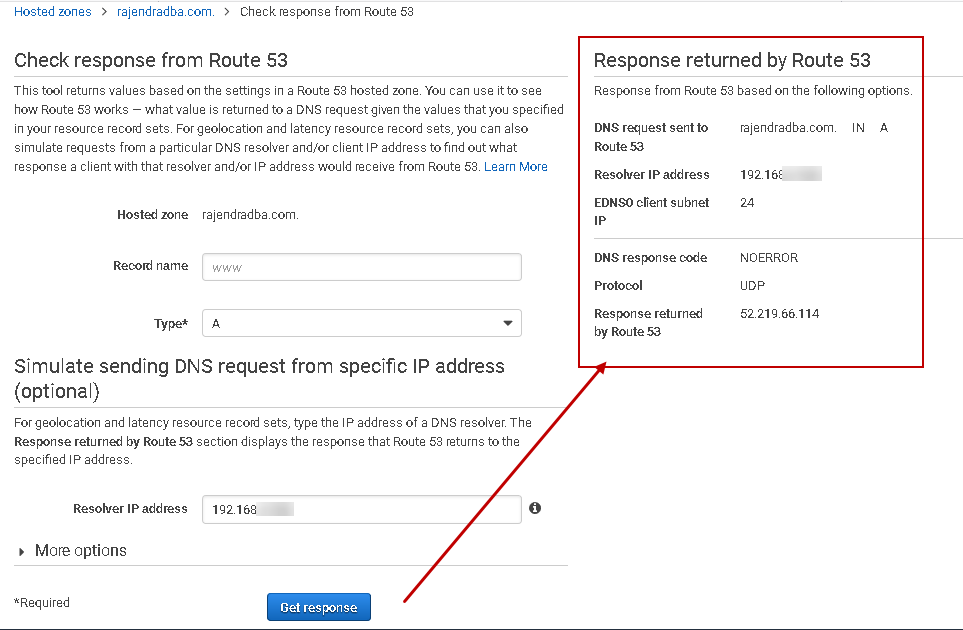
We can test the newly created record set as well. Click on the Test record set.
Specify your system IP and click on Get response. It checks the response from Route 53, and you get the following output. In case of any error, it shows you an error message.
Now, you can test your Amazon S3 static website using the custom domain. Open a web browser, specify the domain, and it launches the website as shown below.
In case you specify a wrong URL, it navigates to the error page that we configured during static website configuration.
Conclusion
In this article, we traversed the configuration of a static website using the AWS S3 bucket. We also used a custom domain to launch the static website. You can create the website pages, upload them into an S3 bucket, and users can access the website. You do not require to maintain any backend servers. It is a serverless architecture, and AWS manages them for you automatically.







No comments:
Post a Comment